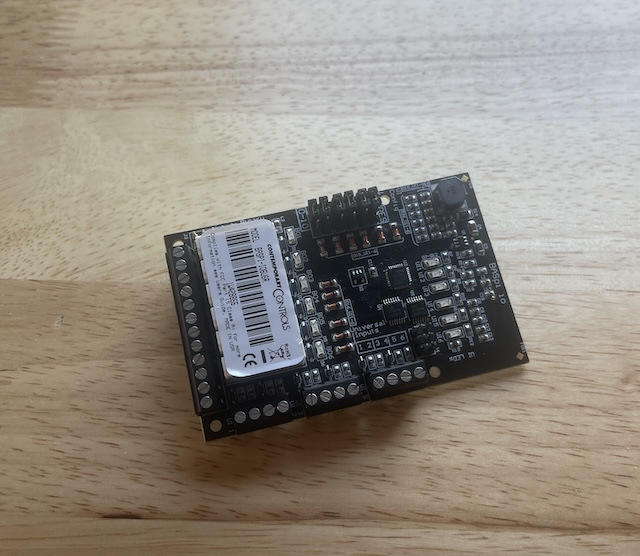
The BASpi is a raspberry pi HAT that can turn your raspbery pi into a configurable BACnet device. BACnet devices are used in commercial HVAC building automation. It is how large commercial buildings are able to trigger during a certain time of day or trigger from another sensor.
For example, a BACnet devices can be used for turning down and turning up building air conditioning during certain times of day or year. It can be used for triggering a ventilator when smoke is detected.
BACnet are doing a lot of the building automation in the background that you didn’t even know about. Since ICS devices are going more and more towards smart devices these devices are now going over protocols such as ethernet or even IoT protocols such as Zigbee. Here is a look at the BASpi I picked up:

This was my first project I took on that was an industrial or commercial IoT device and how these devices worked. This BASpi was good introduction into how BACnet protocol works and they operate.
This BASpi can be purchased here at this URL.
BASpi Points
When set up the BASpi acts a server allowing for both physical and virual points to be reached and communicated with. The following points are created when the BASpi server is running:
- 12 physical points:
- 6 Analog Input (0-10V), Binary Input, Resistance, Thermistor (10KT2, 10KT3, 20K), Pulse Input max (40Hz).
- 6 Six Relay Outputs (2A max current) or Four Relay and Two Analog Outputs (0-10 V).
- 24 virtual points:
- 24 Virtual Points used to read or write data to/from wire sheet by a BACnet client/supervisor station
- 48 Web Components - allow live monitoring and forcing of wire sheet points from the BASpi’s web page
BASpi Setup Guide
URL Docs:
Hardware Requirements:
- BASpi HAT
- Raspberry Pi 3 or 4
- 8GB or larger micro SD card
- micro SD card to USB adapter
Installation Types:
- Method A - Flash a Micro SD with pre-built Raspbian OS image and BASpi firmware already installed.
- Method B - Install BASpi firmware files to an already running Raspbian OS.
Method Type A Steps I Did:
- Power OFF the Raspberry Pi.
- Mount the BASpi-IO hat on GPIO pins 1-10 on your Raspberry Pi as shown in the images here.
- Download the BASpi image. https://www.ccontrols.com/basautomation/baspisoftware.htm (Make sure to select the right BASpi hat you have purchased. I had purchesd the BASpi-IO6U6R)
- Place the Micro SD into the USB adapter and then connect to external computer.
- Use Raspberry Pi Imager, https://www.raspberrypi.com/software/, to flash your Raspberry pi Micro SD card.
- Select the custom operating system option at the bottom for the Rasperry imager to point to the image downloaded earlier.
- Place Micro SD into the Raspberry pi.
- Turn ON the raspberry pi.
- Connect the raspberry pi to the internet via wireless or ethernet.
- Find it’s IP address by doing a
ifconfigcommand in the terminal. - From an external computer connect to the IP address given to the raspberry pi. There you will see the interface of the BASpi server.
- Type in User Name: admin, Password: admin.
- Now should see the BASpi server interface.
Conclusion
After all is installed and it working properly, it is time to start playing around with the device.